Throughout this article, we’re going to discuss the importance of ClickTags & AdTags and why you need to implement them on your Google Ad Manager.
Let’s get into it!
First Things First: What are Ad Tags & Click Tags?
To put it simply, an AdTag consists of a piece of HTML code. This code is inserted within the source code of a web page, that is, where the ad you’ve created will be displayed.
It’s made up of a URL (from the browser which requests the ad) + HTML or JavaScript code (which will let the browser know how exactly to display the ad). Too much information? No worries, you’ll get the hang of it!
Here are 2 examples of what AdTags look like:
- <script src=”https://cdn.onlymega.com/cjxrhtpod00065epdpqc1fik1/embed.js?bnTag=” async></script>
- <iframe src=”https://cdn.onlymega.com/cjxrhtpod00065epdpqc1fik1/embed.html?bnTag=” style=”border:none;width:300px;height:250px;” frameborder=”0″ scrolling=”no”></iframe>
When this code is placed on a website, it automatically displays the HTML5 banner you designed.
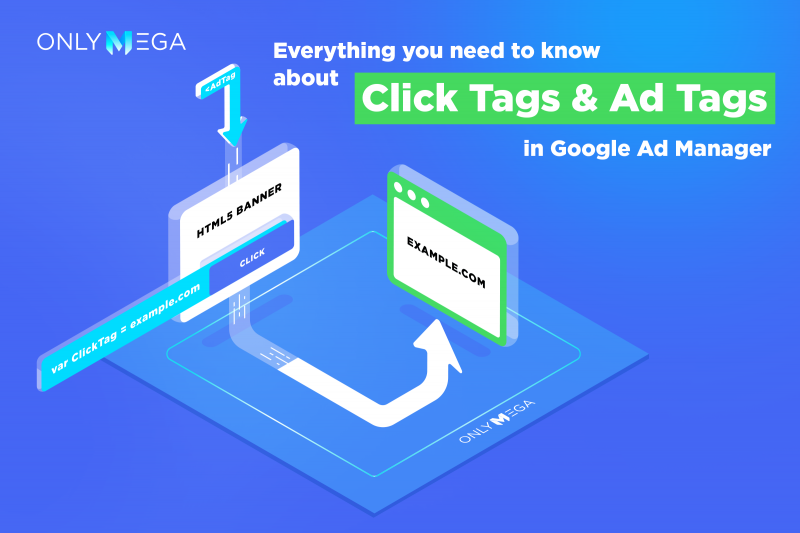
ClickTags, on the other hand, are a click-through URL. In HTML5 ads, this is a shortcut for setting the click-through URL in the platform. A click tag is implemented when you want to track impressions and clicks without the need of the API overhead.
Here’s an example of a ClickTag passed to the adtag:
<script src=”https://cdn.onlymega.com/cjxrhtpod00065epdpqc1fik1/embed.js?bnTag=%%CLICK_URL_ESC%%%%DEST_URL_ESC_ESC%%&cb=%%CACHEBUSTER%%” async></script>
ClickTags can be inserted in an HTML5 banner which was exported as a ZIP package. Once this ZIP is uploaded to Google Ad Manager, you will be able to control landing page URLs, for instance, from the Google Ad Manager dashboard directly. This means that the banner will always open the URL that will be passed to it from the Google Ad Manager.
How do Tags Work with HTML5 Display Ads?
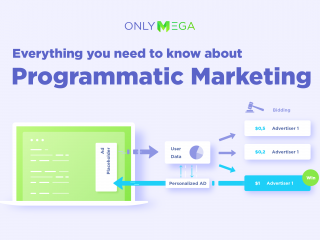
To put it simply, an AdTag can display different HTML5 ads, based on the user that loaded the ads on the website. This is called: Programmatic Advertising which basically refers to showing different ads, with different content based on the information gathered about the user.
For example, a simple banner you uploaded as a ZIP will always show the same content to all users.
To put it as simply as possible, this is how AdTags work:
- The user loads the page where the AdTag is located.
- When this AdTag loads, it passes information about the user down to the Ad Server.
- Then, the Ad Server decides which ad is more efficient to show based on the information gathered about that user. A quick example of this: Product IDs the user recently viewed. Also, the Ad Server can even have A/B tests running to decide which ad is better.
- The user finally sees the ad.
- The AdTag can now pass on the information about “how” the user interacted with the banner back to the Ad Server. This is if, for instance, the user hovered over the banner and didn’t click, how long the user watched the video inside the ad and even how long the banner was playing animation until the user closed the page.
Let’s move on.
But Wait, What is a Third-Party Ad Tag?
Well, this is a piece of JavaScript code, generated by a third-party Ad Server. This is placed into an ad inventory space within a website, which will display the creative which was previously uploaded on the ad server.
Ok, but if that’s too confusing, let’s go again. Basically, the third party AdTag is the AdTag hosted on a specialized service, in which you create and store banners, including specific banners displaying specific rules or A/B tests.
One of these third-party Ad Servers is BannerNow, which allows you to design animated banners, schedule them on a certain time & date, maybe you need to schedule different banners on weekends, well this server can help you do that. You can also create A/B tests and retrieve analytics for the AdTags, which includes animation duration, impressions, CTR, rollovers, video duration, heatmaps, etc.
Now, don’t let the big words get you confused though! All the work done after implementing a tag happens almost automatically, you don’t need to really think about the process. However, this is excellent and useful information, especially when considering options for the most optimized way of serving your ads.
But… Why Do You Need to Implement Ad Tags?
Well, there are many reasons why you need to implement these tags when advertising in the display network.
Let’s go over the 5 reasons why you need to implement ad tags:
- Ad tags collect important & specific information regarding users who see ads for user segmentation purposes.
- This will help you optimize your ad strategy quickly and easily, you’ll be able to use your budget to the fullest. Plus, you’ll be able to make adjustments as the ad runs.
- Make changes from the ad server itself instead of heading directly to each publisher.
- You’ll be able to track important ad engagement and visibility.
- It’s possible to schedule all your campaigns to display specific ads on special dates such as Christmas, New Years, Black Friday, etc.
And there’s more… Nowadays, Google, Facebook, Microsoft and Amazon control over 80% of online advertising. Corporations and startups are spending millions on creating engaging ads, so the cost for displaying banners has naturally skyrocketed.
This is why it’s important that EACH impression for your ad is displayed to the RIGHT user. And, don’t forget how important it is to optimize your ads through A/B testing. Always, always, be TESTING!
So, yes, if you ask us, we would say it’s a big deal to implement these. They make a huge difference and really help you make improvements to your ads.
ClickTags, What are These For?
So now that you know what ClickTags are, you need to know about the purpose they fulfill.
First, ClickTags are not an alternative to AdTags. It is simply a way of passing the click URL to the banner. Nothing too complicated!
For example, the ClickTag can be passed to the banner which was uploaded as a ZIP to Google Ad Manager. When you download the HTML5 banner from OnlyMega, it will already contain the custom JavaScript snippet that controls ClickTags passed to the banner. This means that you won’t need to write any code, it works from the box.
After download, upload it to the Google Ad Manager, set the target URL and that’s it! The uploaded banner will open the target URL you set since it contains the ClickTag handling by-design.
Using clickTags with AdTags is not very complicated, to tell you the truth. Because the ClickTag is passed to the AdTag via Macros (a special string constant that will be replaced by the real URL when the AdTag is loaded on a web page).
Here’s an example:
<script src=”https://cdn.onlymega.com/cjxrhtpod00065epdpqc1fik1/embed.js?bnTag=%%CLICK_URL_ESC%%%%DEST_URL_ESC_ESC%%&cb=%%CACHEBUSTER%%” async></script>
In this Ad tag – %%CLICK_URL_ESC%%% is a macros string that tracks/counts clicks on Google Ad Manager – %%DEST_URL_ESC_ESC%% is a macros string that is a click/destination URL, and – %%CACHEBUSTER%% is a macros string adds a random number to the ad tag so that the browser doesn’t cache the banner.
When the user opens the page (with the AdTag), this is what it’ll look like:
<script src=”https://cdn.onlymega.com/cjxrhtpod00065epdpqc1fik1/embed.js?bnTag=http://googleads.g.doubleclick.net/pagead/aclk%3Fsa%3Dl%26ai%3DBsD-iGQbNSun3LJvqjQTg0MWeDOCtkEmu5vD7CsCNtwGQThABGAEg9084AFCAx-HEBGDJhvuGyKOQGYgBAaABzvrC_wOyARN3d3cuY29ycC5nb29nbGUuY29tugEKMzAweDI1MF9hc8gBCdoBWWh0dHA6Ly93d3cuY29ycC5nb29nbGUuY29tL2VuZy90ZXN0aW5nL1RTL2RvY3MvdGVzdHBsYW5zL2NhZmVfdGVzdGluZy90ZXN0XzNyZF9wYXJ0eS5odG1suAIYqAMB9QMAAAAE9QMEAAAA%26num%3D1%26client%3Dca-mongoogle%26adurl%3Dhttps%3A%2F%2Fonlymega.com&cb=1234″ async></script>
If you take a closer look, you’ll notice that the macro strings were replaced with real URLs. One URL tracks redirects and the other controls the URL in which the user will be redirected once the banner is clicked.
2 Ways to Publish Display Ads with Tags to the Google Ad Managers
So now that you’ve got the tags down. It’s time you publish these into your Google Ad Manager and see how well they work.
First Option: Zip File
- Create and download your banner from Onlymega
- Upload to Google’s Ad Manager
Remember that Onlymega will generate a zip file, which already includes a clickTag that Google recognizes! So no hassle for you there.
Second Option: Embedded Code
- Create a banner on Onlymega
- Copy the AdTag code
- Follow the rest of the steps from our knowledgebase here.
Great, but which option is the best suited for you?
We think the best and most convenient is the second option, which contains the embedded code. Why? Because this will allow you to control the creative on the Onlymega dashboard.
Ok, so let us explain a bit here:
Imagine you created a banner set which consists of 20 banners, all different sizes. But, you need to update only one word on a CTA button. If you were to have gone with the first option (zip file) you would then need to upload each size manually into the Google Ad Manager and find out which is the one you need to change.
But, if you’re using tags, all you need to do is publish them and you’ll be able to edit the banner within Onlymega. Any edits you make will be automatically updated on Google’s Ad Manager, without the need to re-upload every time you need to make a change. Excellent!
Some Useful Tools for Validation
- clickTag validator for uploaded ads: https://h5validator.appspot.com/3pas/asset
- clickTag Validators for Ad tags (embed code): https://dfpgpt.appspot.com/
Well, there you have it! Now you know how useful AdTags and ClickTags can be for your campaigns. Not only will they provide you with valuable information about your campaigns, but they are also useful for when editing creative on your banners as a whole. And hey, if you have any questions, concerns, or comments, make sure you reach out! We are happy to help with your tech questions 🙂

